When you’re creating an email template, it’s easy to jump straight to the design and copy. But before you even think about colors or calls-to-action, there's a more critical first step: building a solid foundation of email privacy and security.
A great template isn't just about looking good—it's about earning trust. Every link, every image, and every piece of data has to be handled in a way that protects your recipient and builds their confidence in your brand. A secure template is essential for protecting your audience from phishing, data leaks, and other cyber threats.
Building a Foundation for Secure Email Templates
Learning how to create an effective email template starts with a security-first mindset. Think of it this way: the most beautiful email in the world is useless if it lands in the spam folder, leaks private data, or makes your recipients feel unsafe.
This means making conscious decisions from the very beginning to protect both your audience and your reputation. One of the most important of these foundational choices is whether to send emails yourself or use a dedicated, hosted email platform built for security.
The Role of Hosted Platforms in Security
Sending emails directly from your own server might seem like the simplest route, but it's a minefield of potential security and deliverability problems. This is where hosted email platforms like Typewire come in. They are purpose-built to handle these complexities, giving your communications a secure and reliable home.
These services do the technical heavy lifting for you, ensuring everything you send meets strict industry standards for both privacy and security. That professional handling is what separates a legitimate, secure email from one that gets flagged as spam or poses a risk to recipients.
Here’s what you get by using a security-focused hosted platform:
- Managed Infrastructure: They handle the servers, IP reputation management, and authentication protocols (like SPF, DKIM, and DMARC) that are absolutely essential for good deliverability and preventing email spoofing.
- Built-in Security: You'll often find features like automatic HTTPS on all tracking links, secure hosting for your images, and dynamic content sanitation to block common vulnerabilities like cross-site scripting (XSS).
- Compliance and Best Practices: A reputable platform keeps up with ever-changing email standards and privacy laws (like GDPR and CCPA), which takes a huge compliance weight off your shoulders.
A hosted email platform is essentially a secure intermediary. It’s like having an expert security team dedicated to your email delivery, making sure every message is authenticated, compliant, and trustworthy before it ever hits a single inbox.
Adopting a Privacy-First Mindset
"Privacy-first" isn't just a trendy phrase; it’s a practical strategy for building a communication channel people can rely on. When you put user privacy at the forefront of your template creation process, you naturally create a better, more secure experience that encourages genuine, long-term engagement.
For example, consider how images are loaded in an email. When a recipient opens your message, the image download can reveal their IP address, location, and device details to the server hosting the image. A secure platform can serve as a proxy for these images, effectively shielding that user data from third-party servers. It’s a small detail that makes a big difference in protecting user privacy.
This mindset should influence your content, too. Every link must point to a trustworthy, HTTPS-secured destination. Any personalized data you use has to be handled with extreme care to prevent leaks. And your unsubscribe process needs to be dead simple and honor user requests immediately.
By building your templates on a foundation of respect for user privacy and robust security, you're doing more than just improving deliverability—you're cultivating a loyal audience that trusts you. This is the real first step to creating email templates that actually work.
Designing for User Trust and Engagement

Once you’ve got your security strategy sorted, it’s time to bring it to life visually. Great email design is so much more than pretty colors and fonts; it's about creating a predictable, trustworthy experience that shows you respect your users' privacy and security. Every single element, from your layout to your typography, plays a role in how someone perceives your brand’s credibility.
The key is to design with clear intention. You want to guide the reader’s eye, make the information easy to scan, and subtly communicate that their security is a top priority. Steer clear of cluttered layouts or confusing navigation—these can instantly create a sense of unease and make your email feel unprofessional or, worse, like a phishing attempt.
Building Trust Through Predictable Layouts
A consistent, intuitive structure is the bedrock of user trust. When someone opens your email, they should feel a sense of familiarity, especially if they’ve heard from you before. This predictability makes your message feel safer and more legitimate because it doesn’t require them to overthink its authenticity.
The best way to achieve this is with a strong visual hierarchy. Use clear headings, generous white space, and logical content blocks to walk the reader through your message. When you create email templates with a consistent header, footer, and branding, you establish a recognizable pattern that users subconsciously learn to trust, helping them distinguish your legitimate emails from phishing scams.
This is non-negotiable for transactional emails like password resets or purchase confirmations. People have a very specific expectation for what these should look like, and any weird deviation is an immediate red flag for a security threat.
Avoiding Deceptive Design Patterns
In the race for clicks and opens, it’s tempting to use "dark patterns"—design tricks that mislead users into doing things they didn't mean to. Let me be clear: these tactics are the fastest way to obliterate trust, violate user privacy, and will wreak havoc on your deliverability.
Here are a few common deceptive patterns you absolutely must avoid:
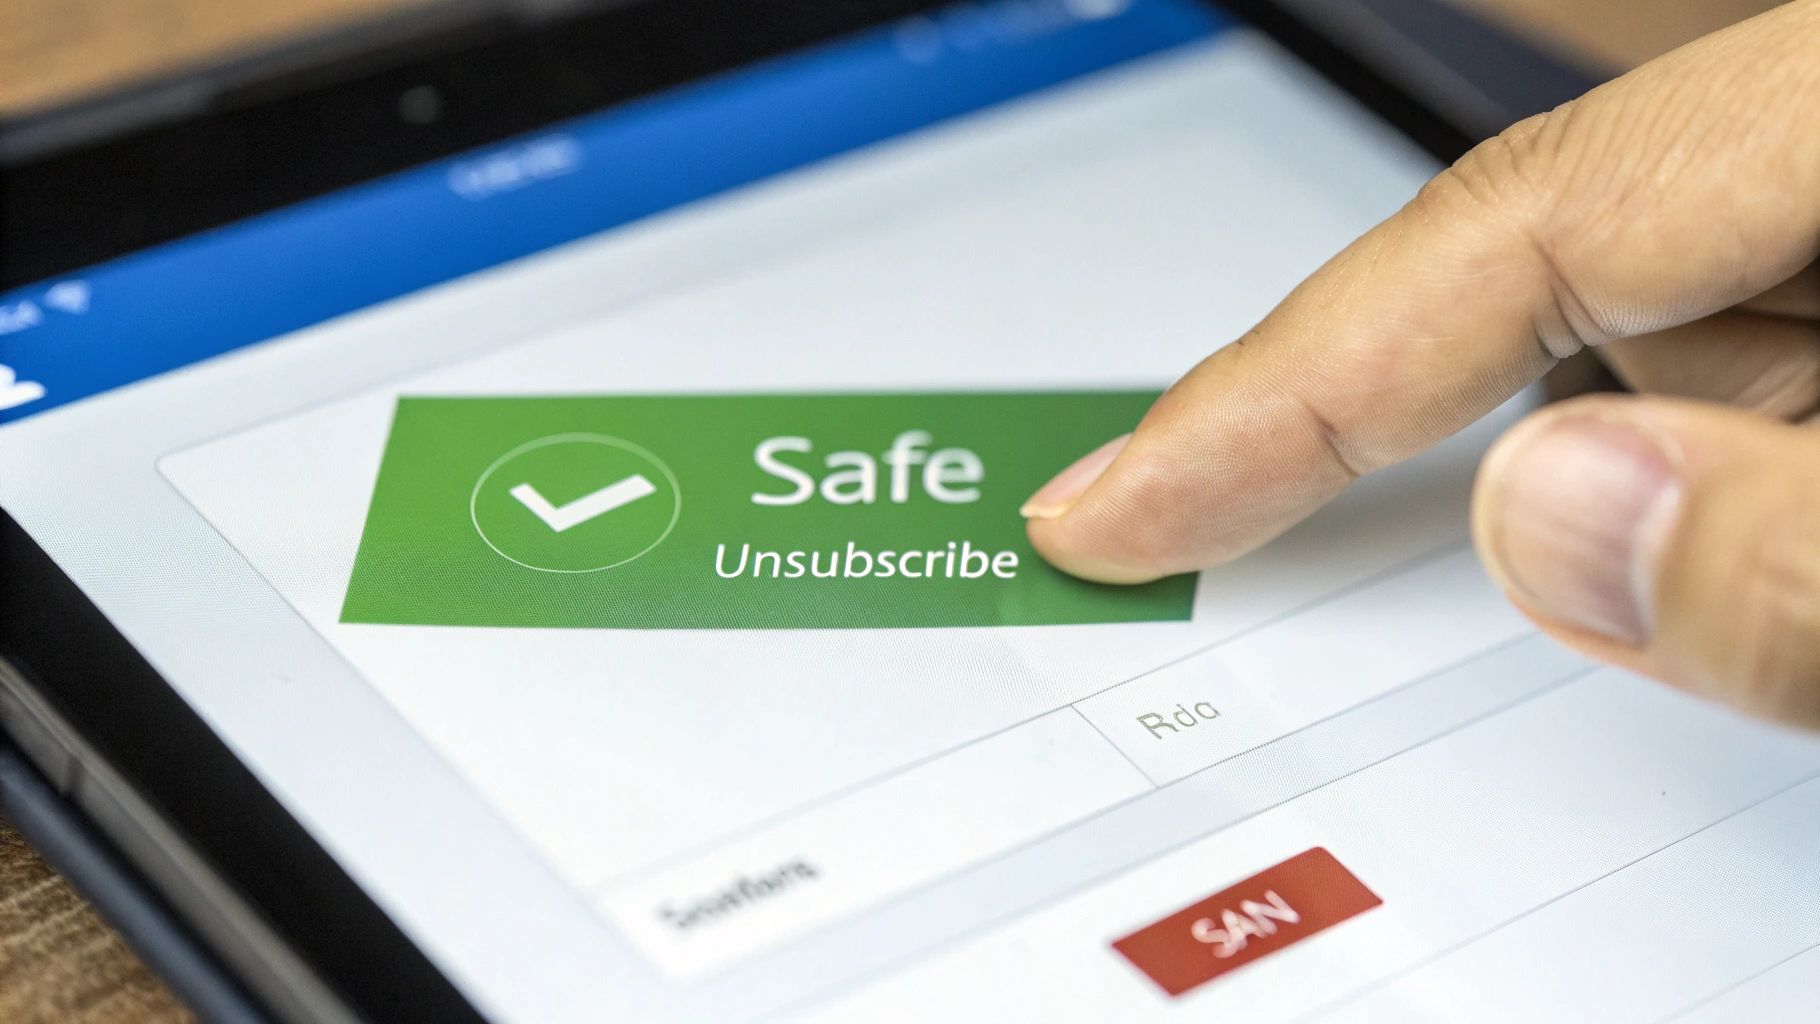
- Hidden Unsubscribe Links: Burying the unsubscribe link in tiny, light-gray text at the very bottom is a classic. Always make it obvious and easy to find to respect user choice and comply with anti-spam laws.
- Misleading Subject Lines: Clickbait that has nothing to do with the email's content will only annoy people and earn you a one-way ticket to the spam folder.
- Confusing Button Text: Using vague language on your calls-to-action ("Continue") can trick people into clicking something they wouldn't have otherwise. Be specific ("Complete Your Secure Purchase").
A trustworthy design is an honest one. Your layout should empower users by making their choices clear, not manipulate them into engagement. Real engagement comes from providing genuine value, not from trickery that erodes privacy and trust.
Email Client Design Considerations
Every email client renders HTML and handles security a little differently. What looks perfect in Apple Mail might break in Outlook. This table gives you a quick rundown of what to watch out for across the big three, especially concerning privacy features that can impact your design.
| Feature | Apple Mail | Gmail | Outlook | Security/Privacy Implication |
|---|---|---|---|---|
| Image Rendering | Generally good; Mail Privacy Protection (MPP) pre-loads images via proxy. | Excellent support; caches images through its own proxy server. | Notoriously tricky; often blocks images by default and uses a different rendering engine. | MPP and Gmail's proxy hide the user's real IP address and prevent accurate open tracking based on image pixels, enhancing user privacy. |
| Responsive Media Queries | Full support. | Full support. | Limited support, especially on Windows desktop versions. Can break mobile-first layouts. | Inconsistent rendering can make an email look broken or unprofessional, eroding trust and potentially hiding important security information. |
| Dark Mode | Offers its own color inversion, which can alter your design's colors. | Supports @media (prefers-color-scheme: dark) for custom dark mode styles. |
Varies by version; some auto-invert colors, others do not. | If not properly tested, your text or images could become unreadable, creating a poor and untrustworthy user experience. |
Ultimately, you have to design defensively. Assume images might be blocked and that colors could be inverted. A robust, secure template is one that remains clear and functional no matter how the client decides to display it.
Transparency in Tracking and Performance
Email tracking, like monitoring opens and clicks, is standard practice, but how you do it matters more than ever from a privacy perspective. With privacy features like Apple's Mail Privacy Protection blocking tracking pixels, your design must function perfectly whether those pixels load or not.
Using a secure hosted email platform to manage your templates often helps by handling tracking in a privacy-first way, such as routing images through a proxy to shield user IP addresses. It’s also just good practice to be transparent in your privacy policy about what you track and why. This honesty builds confidence and shows you respect your users' control over their data.
Remember, your design choices have a massive impact on performance. With over 51% of emails being opened on Apple Mail and another 27% on Gmail, your templates have to render flawlessly on these platforms. Responsive design isn’t just a nice-to-have; it’s critical for reaching the nearly 4.6 billion email users worldwide. To see how this applies in practice, checking out a guide on building B2B lead nurture campaigns that convert can provide some fantastic, real-world strategies.
Writing Secure and Compatible HTML
Alright, let's get down to the code. This is where your design comes to life, but writing HTML for email is a whole different beast than building a webpage. Forget the latest CSS frameworks and modern tricks. Email development is all about building robust, secure, and universally compatible code that won't fall apart in the wild world of different email clients.
The reality is, you're building for a fragmented ecosystem. From Gmail and Apple Mail to the notoriously picky Outlook, each client has its own quirky way of rendering HTML. Your mission is to write code that looks great everywhere, and that starts with a security-first mindset. It's not just about aesthetics; it's about building trust and protecting your recipients with every line of code.
The Foundation of Compatibility: Tables for Layouts
I know what you're thinking. Tables for layout? Didn't we leave that behind in the early 2000s? For web design, yes. For email design, tables are still king. They are the single most reliable tool in your arsenal for ensuring your layout holds together across every major email client.
Think of tables as the scaffolding for your email. They create a rigid, predictable structure that prevents your carefully crafted design from collapsing into a jumbled mess in less capable clients like older versions of Outlook.
- The Main Container: Kick things off with a single master table that wraps all your content. This is what sets the overall width and centers your email in the user's inbox.
- Rows and Columns: Inside that main table, you'll nest other tables to create your content rows—header, body, footer, you name it.
- Content Cells: Your actual text and images live inside table cells (
<td>). This is how you guarantee alignment and proper spacing.
It feels a bit old-school, I get it. But this method's universal support is precisely why it remains the industry standard. To build emails that work for everyone, you have to code for the lowest common denominator first. You can dive deeper into the nuances of various platforms by exploring our guide on what is an email client and why its rendering engine matters so much.
Embedding Security Directly into Your Code
A secure template doesn't happen by accident. You have to build it with intention from the ground up, actively looking for and closing potential security gaps as you write your HTML. This is especially true if you’re pulling in dynamic content or linking to external assets.
The most important habit you can develop is enforcing HTTPS on every single link. No exceptions. Whether it's an image source (src) or a hyperlink (href), it absolutely must start with https://. This simple step encrypts the connection, protecting your users from man-in-the-middle attacks where a malicious actor could intercept or change the content in transit.
Security isn't an add-on; it's a core component of the coding process. Sanitizing every piece of dynamic data and forcing secure connections on all assets are non-negotiable steps for building a template that protects both your brand and your audience.
On that note, stay far away from scripts. Never, ever embed JavaScript or any other scripting language in your email. Nearly every email client blocks them on sight for security reasons, and their presence is a huge red flag for spam filters. Stick to clean HTML and inline CSS, and you'll be fine.
Creating an Essential Plain-Text Version
For every beautiful HTML email you build, you need a plain-text counterpart. This isn't just an afterthought—it's a critical part of a professional email strategy that enhances both security and privacy. Many people, particularly in corporate or high-security settings, set their email clients to block HTML by default. Without a plain-text version, your message is dead on arrival.
A plain-text version is also essential for:
- Accessibility: Screen readers used by subscribers with visual impairments can parse clean, simple text far more reliably than they can navigate complex, table-based layouts.
- Deliverability: Spam filters get suspicious when an HTML email arrives without a plain-text alternative. Including one is a strong signal that you're a legitimate sender who follows best practices.
- User Choice & Privacy: Some people just prefer reading text-only emails to avoid tracking pixels and other potential privacy concerns. Giving them that option is a small but meaningful way to respect their preferences.
While crafting your HTML, don't forget about making your images accessible, too. Learning about properly adding captions or alternative text to images is a key skill. This, combined with a solid plain-text version, ensures your email is inclusive and robust. Just make sure your plain-text version includes all the same crucial information and links as the HTML, formatted with simple line breaks to keep it readable.
Testing and Deploying Through a Hosted Platform
So, you’ve coded your template. It looks great on your screen, but it’s not really done until it survives in the wild. This last leg of the journey—testing and deployment—is where the rubber meets the road. It’s how you make sure your template is not just well-designed, but also secure, reliable, and ready for every inbox imaginable.
This is exactly why a dedicated hosted email platform is a non-negotiable part of the process. Trying to send mass emails from your own server is a recipe for disaster, throwing you into a world of deliverability nightmares and security headaches. Hosted platforms are built specifically to handle this chaos, giving your emails a secure, optimized path to your audience.
The Security Edge of a Hosted Platform
When you use a professional service like Typewire, you’re not just getting a "send" button. You’re tapping into a level of security that’s practically impossible to build yourself. These platforms are engineered from the ground up to tackle the immense technical challenges of modern email, making sure your messages are both protected and delivered.
Instead of getting bogged down in server configurations, you get a fully managed environment that handles all the critical security work behind the scenes. This means they’re constantly maintaining IP reputation, managing complex authentication protocols, and staying ahead of the latest anti-spam tactics.
The security benefits are very real:
- Managed Deliverability: Top platforms work tirelessly to maintain high deliverability rates. This isn’t just about getting into the inbox; it’s a security signal that proves you’re a legitimate, trusted sender.
- Centralized Template Management: Your templates live in one secure, controlled spot. This simple feature prevents team members from accidentally using old, vulnerable versions or making unauthorized changes.
- Automatic Link Security: Good platforms automatically enforce HTTPS on all tracking links. Many also proxy image requests to help protect user privacy by masking IP addresses.
Your Pre-Deployment Checklist
Before you even think about hitting send, you need to run your template through a rigorous testing gauntlet. This is more than just a quick spell-check; it’s a full-blown security audit to ensure every piece of your email works exactly as intended without creating any risks.
I like to split my checklist into two key areas: rendering and security. Both are absolutely critical for building trust with your subscribers.
Rendering and Functional Tests
This is all about making sure your email looks and works perfectly for everyone, no matter what device or email client they’re using.
- Cross-Client Rendering: Use a tool like Litmus or Email on Acid to preview your template across dozens of clients. You’d be amazed how different an email can look in Outlook versus Gmail on an Android phone.
- Link Validation: Click every single link. Seriously, every one. Make sure they all lead to the correct, secure (
https://) page. Nothing kills trust faster than a broken or insecure link. - Image Loading: Double-check that all your images load and, just as importantly, that the alt text shows up when images are blocked by the email client.
- Plain-Text Version Review: Don't forget the plain-text fallback! Open it up and make sure it’s clean, readable, and includes all the essential information and links.
- Mobile Responsiveness: Drag your browser window to be narrow, or better yet, use a mobile simulator. Does your responsive design kick in correctly? Do the buttons stack properly?
The diagram below breaks down the fundamental process for creating secure HTML in the first place—this is the foundation for any template that will pass these tests.
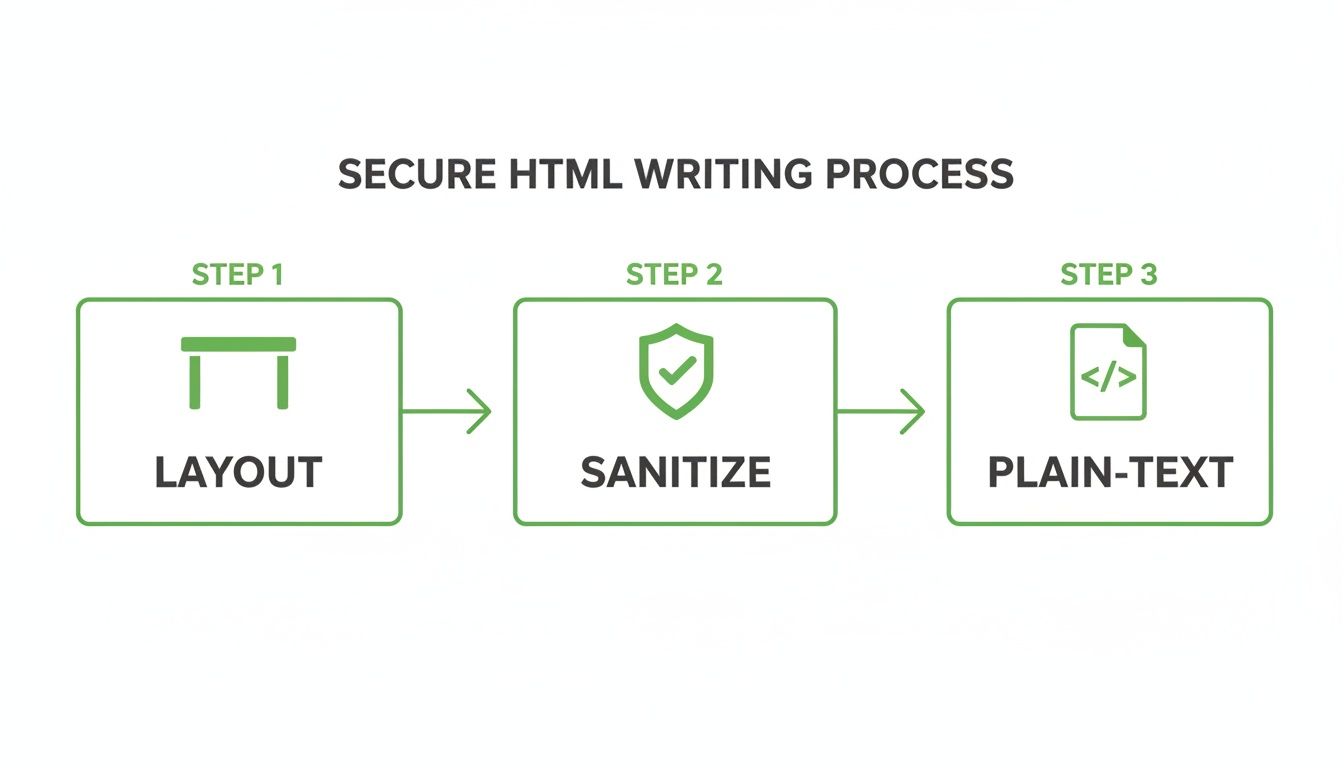
This three-step flow—structuring with tables, sanitizing inputs, and always providing a plain-text version—is at the core of building a secure and universally compatible email.
Security-Specific Audits
Now it’s time to put on your white hat and actively search for vulnerabilities.
- Check for Open Redirects: Make sure none of your links can be tricked into redirecting users to a malicious website. This is a classic phishing tactic.
- Test Personalization Tokens: Send tests with both placeholder data and real data. You need to be 100% certain that your personalization logic works and will never, ever expose one user's private information to another.
- Scan for Mixed Content: Every single asset in your email—images, web fonts, CSS files—must be loaded over HTTPS. Mixed content triggers security warnings in browsers and is a major red flag for privacy.
A rigorous testing process is your final line of defense. It’s what transforms a well-designed template into a trustworthy communication tool, ensuring that what you send is exactly what your audience safely receives.
Managing Templates Securely on a Platform
Once your template aces all its tests, a hosted platform gives you the tools to manage and deploy it securely. This is about so much more than just a folder to store HTML files. For any business serious about security, it’s worth looking into the top hosted email platforms for business security to find the right fit.
Platforms like Typewire let you set up custom sending domains, which is essential for brand recognition and deliverability. But just as important are the user permissions. You can control exactly who on your team can create, edit, or send campaigns. This creates a secure workflow that prevents costly mistakes, accidental sends, or unauthorized changes, protecting the integrity of your email program for the long haul.
Getting the Most Out of Your Templates (And Keeping Them Secure)
You’ve designed, built, and tested your email template. The hard part is over, right? Not quite. Now the real work begins: turning that template into a secure, profitable, long-term asset.
A great template isn’t a "set it and forget it" project. It’s a living tool that needs to adapt over time while protecting both your audience and your brand. This is where we move past the initial setup and into the strategies that drive real, ongoing success with a focus on privacy and security.
The goal is to build a communication channel that’s not just effective but also deeply trusted by your subscribers.
Think in Systems, Not Files: The Modular Approach
A single, monolithic email template is a ticking time bomb. Every time you need to update a promo banner, change a footer link, or add a new social media icon, you’re performing open-heart surgery on your code. It’s risky and inefficient.
This is why experienced teams swear by a modular template system, often managed within a secure hosted platform. Think of it like building with LEGOs. Instead of one giant, unchangeable block, you have a library of reusable components: headers, footers, product blocks, CTA sections. You just mix and match what you need.
Adopting this mindset has massive security and privacy payoffs:
- Safer Updates: Need to change that privacy policy link in the footer? You edit the footer module once, and the change instantly and safely applies to every template using it. This alone slashes the risk of human error.
- Rock-Solid Brand Consistency: A modular system is your best defense against brand drift. Every email sent from your organization will have the same polished look and feel, which is crucial for building user trust and preventing phishing confusion.
- Launch Campaigns Faster: Assembling a new email becomes as simple as picking the right blocks. Your team can stop fighting with code and start focusing on crafting a compelling, secure message.
Handling Dynamic Content Without Opening Security Holes
Personalization is a game-changer for engagement. Adding a user's name or their recent order details can make an email feel much more relevant. But if you're not careful, it can also create severe privacy and security vulnerabilities.
The key is to properly sanitize any dynamic content before it ever touches your template. A common mistake is failing to escape special characters in user-provided data. This could allow a bad actor to inject malicious code (XSS) that gets rendered in another user's email client, potentially stealing their data.
While a good hosted email platform often handles this for you, it's critical to understand the principle: never implicitly trust user data.
A secure template is built defensively. It assumes any piece of dynamic content could be malicious and neutralizes it before it gets rendered. This turns a potential vulnerability into a harmless string of text and protects user privacy.
The Direct Line Between Security and Your Bottom Line
The decisions you make about email security and privacy aren't just technical details—they have a direct, measurable impact on revenue. Strong deliverability, high engagement, and user trust are the engines of a profitable email program.
When people trust your emails, they open them, click the links, and buy your products. Following strong email deliverability best practices, which are rooted in security fundamentals like authentication, is the first step to making sure your beautifully crafted templates even get a chance to be seen.
The numbers don't lie. Email marketing continues to offer one of the highest returns on investment available. For 2025, the average ROI for marketing emails is a staggering 3600% to 3800%—that's about $36 in return for every dollar spent. In e-commerce, it can be even higher, sometimes hitting an astonishing 7200%, driven largely by automated and personalized templates.
These figures prove that a secure, user-focused template isn't an expense. It's one of the most profitable investments you can make in building a trustworthy brand. For more stats, you can dig into the latest email marketing ROI insights on Designmodo.
Common Questions About Secure Email Templates
When you start building email templates, a lot of questions come up—especially around security and privacy. And honestly, getting these details right is what separates an email that builds trust from one that gets ignored or, worse, flagged as spam. Let's walk through some of the most common challenges I see people face and how to solve them.
How Can I Keep My Email Templates Out of the Spam Folder?
Avoiding the spam folder isn't about one single trick; it’s a combination of technical hygiene, smart content, and clean, secure design. From a technical standpoint, authenticating your sending domain with SPF, DKIM, and DMARC isn't optional. Think of it as the foundation of trust for every inbox provider out there.
The template's code itself plays a huge role. Stick to clean, semantic HTML and avoid scripts or suspicious code. Steer clear of spam-trigger words like "free" or "act now," especially in your subject lines. Try to maintain a healthy text-to-image ratio, and always, always include alt text for your images. But the most powerful signal you can send is high engagement—so focus on sending valuable content people actually want.
And one last thing: make your unsubscribe link obvious and easy to find. Hiding it is a fast track to a damaged sender reputation and privacy law violations.
What Are the Biggest Security Risks When Creating Email Templates?
The main security risks really come down to exposing data or creating vulnerabilities that can be exploited. One of the scariest is mishandling personalization tokens, which could accidentally leak one user's private information to another. Another big one is using unvalidated external links, which can open the door to phishing attacks or open redirect vulnerabilities.
You also have to think about where your assets are coming from. Loading external content like images or fonts from insecure (http://) servers can create privacy issues by leaking user IP addresses to third parties and triggering browser security warnings. And if your template ever pulls in user-generated content, failing to sanitize it properly could lead to cross-site scripting (XSS) attacks in some web-based email clients.
The single most effective way to sidestep these risks is to use a secure, hosted email platform. These services are built from the ground up to handle these issues by managing assets securely, sanitizing dynamic content, and enforcing security protocols automatically.
Why Is a Plain-Text Version of My Email So Important?
This one is crucial. Including a plain-text version of your email alongside the HTML isn't just a "nice-to-have." It is a fundamental aspect of secure and accessible email design.
First, it’s all about accessibility. Screen readers, which are essential for users with visual impairments, can parse and read plain-text emails far more reliably than they can navigate complex HTML.
Second, it has a direct impact on deliverability. Spam filters often get suspicious of emails that are only HTML, as it's a classic spammer tactic. Providing a plain-text alternative is a strong signal that you're a legitimate sender.
Finally, it’s a matter of user preference and security. Some people, and many corporate email clients, are set up to block HTML emails by default to avoid security threats like malicious code or tracking pixels. A plain-text version guarantees your message still gets through legibly, respecting the recipient's privacy and security settings.
How Do Hosted Platforms Make Email Templates More Secure?
A good hosted email platform provides a managed, secure environment that takes a lot of the technical headaches and security burdens off your plate. They are specifically built to handle sending infrastructure, which means high deliverability and compliance with all the critical authentication standards.
When it comes to your templates, these platforms offer several layers of protection:
- Built-in sanitation for any dynamic content you use, which slashes the risk of injection attacks and data leakage.
- Secure asset management, hosting your images and forcing HTTPS on all links to protect user data as it travels across the internet.
- Centralized user management and access controls, so you can decide exactly who on your team can create, edit, or send emails, preventing unauthorized changes.
This kind of centralized workflow is worlds more secure than passing HTML files around and sending from a local server. It creates a controlled process that prevents unauthorized changes and keeps your communications locked down.
Ready to build secure, trustworthy email communications on a platform designed for privacy? Typewire provides the secure hosting, custom domains, and user management tools you need to send with confidence.