Choosing the right email platform for your business is a foundational security decision that extends far beyond simply sending and receiving messages. A standard inbox might suffice for personal use, but for a business, email is a critical asset that handles sensitive client data, internal strategy, and financial information. It’s a primary target for cyber threats, making robust security, privacy, and dedicated management tools essential rather than optional luxuries. This decision directly impacts your operational efficiency, brand professionalism, and data security posture.
This guide is designed to help you navigate the complex market and find the best email platforms for business communication, with a specific focus on security and privacy. We move past surface-level feature lists to provide a comprehensive roundup of leading hosted email solutions, including Typewire, Google Workspace, Microsoft 365, Proton for Business, and more. When selecting a hosted email platform, security features should be a top priority, underscoring the non-negotiable importance of cybersecurity for small businesses in today's digital landscape.
Here, you will find an in-depth, actionable comparison focused on what truly matters:
- Security and Privacy: Analysis of encryption standards, anti-phishing measures, data handling policies, and data residency.
- Feature Sets: A look at collaboration tools, storage limits, and integration capabilities from a security perspective.
- Ease of Management: Evaluation of admin consoles, user onboarding, and scalability for secure deployments.
- Pricing Structures: Clear breakdowns of costs per user and what security features each tier includes.
Each platform review includes detailed insights, screenshots of the user interface, and direct links to help you make a well-informed choice. We will compare their strengths and weaknesses to help you select a service that aligns perfectly with your business needs, whether you are a privacy-conscious startup, a growing SMB, or an IT administrator securing a remote team.
1. Typewire
Typewire positions itself as a premier hosted email platform for businesses prioritizing data sovereignty, security, and absolute privacy in their communications. Unlike mainstream providers that often treat user data as a commodity, Typewire is architected from the ground up to be a secure, private email hosting platform. It guarantees that business correspondence remains confidential, free from ad-based tracking, and shielded from the data-mining practices common in the industry. This makes it one of the best email platforms for business leaders who cannot afford to compromise on digital privacy.
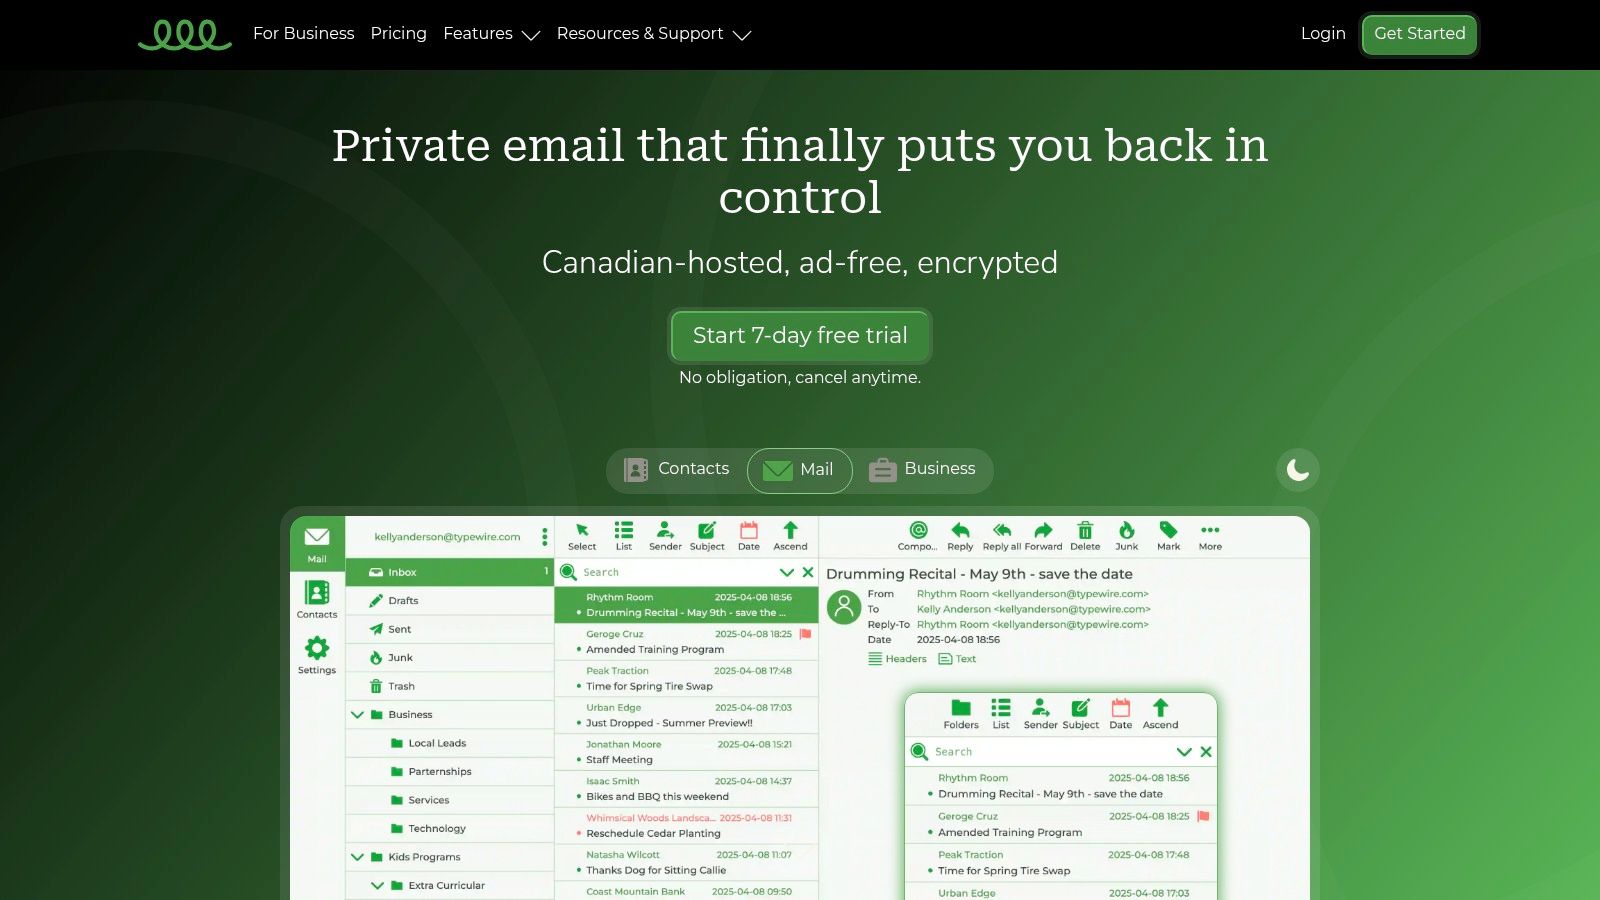
The platform's core strength lies in its unwavering commitment to data locality and legal protection. All data is hosted exclusively on independently owned Canadian data centers in Vancouver, operating under the strict privacy regulations of Canada’s Personal Information Protection and Electronic Documents Act (PIPEDA). This is a crucial differentiator for businesses concerned about data being subject to foreign government surveillance or cross-border data transfers.
In-Depth Feature Analysis
Typewire’s feature set is built to provide robust security without sacrificing usability. Its approach ensures that even businesses without a dedicated IT department can implement and manage a highly secure email system effectively.
- Advanced Security Protocols: Beyond standard protections, Typewire integrates end-to-end encryption capabilities, sophisticated anti-spam filters, and proactive virus protection to safeguard your inbox from a wide array of cyber threats.
- Intuitive User & Domain Management: The platform shines in its simplicity. Administrators can easily add or remove users, set up aliases, and manage storage quotas through a clean, responsive web interface. For those looking to establish a professional brand identity, Typewire provides excellent support for custom domains on its premium plans. Their blog offers a detailed walkthrough, and you can learn more about setting up a custom email domain on typewire.com.
- Seamless Migration: Switching to a new email provider can be a significant hurdle. Typewire addresses this with fast, straightforward migration tools designed to transfer your existing emails, contacts, and calendars in minutes, minimizing downtime and disruption.
Pricing and Plan Structure
Typewire offers a tiered pricing model designed to scale with different needs, from individual professionals to growing teams.
| Plan Tier | Key Features | Ideal User |
|---|---|---|
| Free | Basic email functionality, limited storage. | Individuals or solopreneurs testing the platform. |
| Basic | Increased storage, standard support. | Small teams and freelancers needing a secure email solution. |
| Premium | Custom Domain Hosting, priority 24/7 support, maximum storage. | Businesses requiring a professional, branded, and secure email presence. |
A risk-free 7-day trial is available for premium plans, allowing businesses to fully evaluate the service. Note that a valid credit card is required for verification during the trial setup.
The Verdict on Typewire
For businesses where email privacy and data security are non-negotiable, Typewire is an exceptional hosted email platform. Its commitment to Canadian-only data hosting under PIPEDA, combined with a user-friendly interface and strong security features, makes it a powerful ally in protecting sensitive corporate communications.
While custom domain support is reserved for paid tiers, the investment provides a level of control and peace of mind that is increasingly rare in the digital landscape. If your organization is looking to escape the Big Tech ecosystem and reclaim full ownership of its digital correspondence, Typewire offers a compelling, secure, and truly private solution.
2. Google Workspace (Gmail for business)
Google Workspace, centered around its business-grade Gmail, is one of the most recognizable and widely adopted hosted email platforms. It leverages the familiar, user-friendly interface of consumer Gmail but layers on a suite of powerful administrative, security, and compliance features essential for modern businesses. This combination makes it an exceptionally strong contender for organizations prioritizing ease of use, extensive integration, and robust security without a steep learning curve.
The platform stands out by transforming a simple email inbox into a centralized productivity hub. Beyond sending and receiving emails with a custom domain (e.g., contact@yourcompany.com), users get access to an integrated ecosystem that includes Google Meet for video conferencing, Drive for cloud storage, and collaborative tools like Docs, Sheets, and Slides. This seamless integration ensures that teams can work efficiently without constantly switching between applications.
Security and Administrative Control
For IT administrators, Google Workspace provides a granular security and admin console. This control panel is where the platform truly shines as one of the best email platforms for business, offering robust tools to manage user accounts, enforce security policies, and protect sensitive data.
- Advanced Phishing and Malware Protection: Google employs sophisticated machine learning models to block over 99.9% of spam, phishing attempts, and malware before they reach user inboxes.
- Data Loss Prevention (DLP): Administrators can set up policies to prevent the unauthorized sharing of sensitive information, such as credit card numbers or internal project codes, in outgoing emails.
- Two-Factor Authentication (2FA): Enforce 2FA across the organization to add a critical layer of security to user accounts, significantly reducing the risk of unauthorized access.
- Security Center: Higher-tier plans include a security center that provides analytics, actionable insights, and recommendations to bolster your organization's security posture.
Pro Tip: Utilize the "Security Sandbox" feature (available on higher-tier plans) to automatically scan and analyze suspicious email attachments in a virtual environment. This isolates potential threats before they can impact your network.
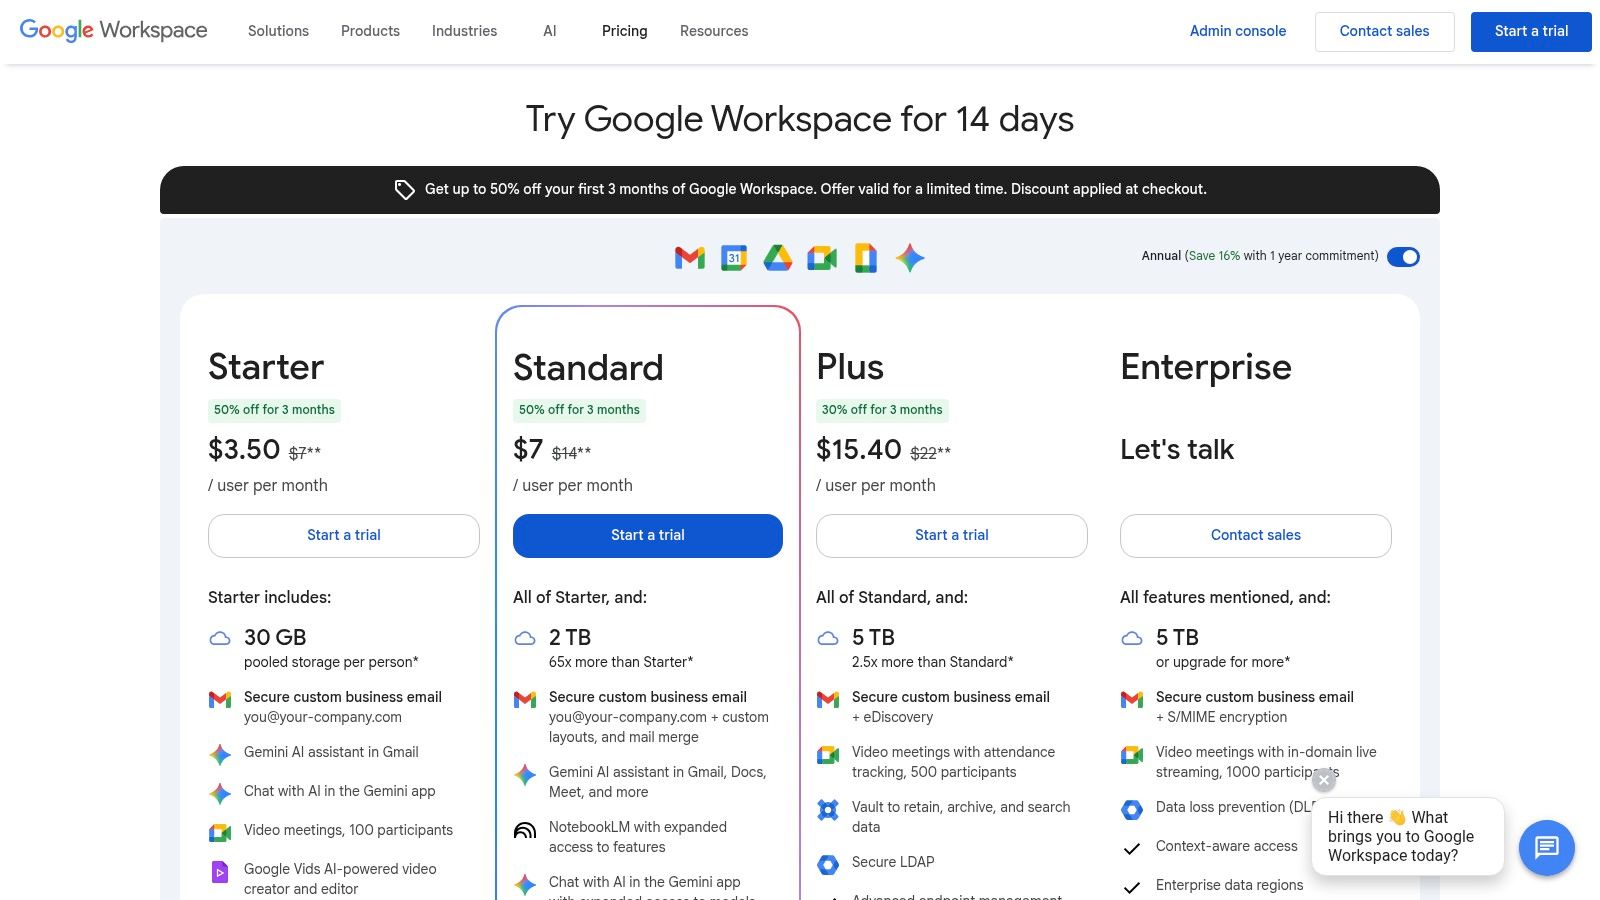
Pricing and Plan Breakdown
Google Workspace offers several pricing tiers, typically billed per user per month. The plans are designed to scale with business needs, from solopreneurs to large enterprises.
| Plan | Key Features | Ideal For |
|---|---|---|
| Business Starter | Custom email, 30 GB storage/user, 100-participant video meetings | Individuals and small teams just starting. |
| Business Standard | 2 TB pooled storage/user, 150-participant meetings + recording | Growing teams needing more storage and collaboration features. |
| Business Plus | 5 TB pooled storage/user, eDiscovery, advanced security controls | Businesses requiring enhanced security, compliance, and data retention. |
The transition to Google Workspace is simplified by built-in migration tools that help transfer emails, contacts, and calendars from legacy systems like Microsoft Exchange or other IMAP-based providers with minimal disruption.
Pros:
- Intuitive user interface that requires little to no training.
- Vast ecosystem of third-party integrations via the Google Workspace Marketplace.
- Excellent reliability and uptime, backed by Google's global infrastructure.
Cons:
- Data privacy concerns inherent with a major tech provider.
- The extensive admin console can feel overwhelming for businesses without dedicated IT staff.
Website: https://workspace.google.com/pricing.html
3. Microsoft 365 for Business (Exchange Online / Outlook)
As a cornerstone of corporate communication for decades, Microsoft 365 offers one of the most powerful and feature-rich hosted email solutions through Exchange Online and the ubiquitous Outlook client. This platform is a titan in the industry, appealing to businesses deeply integrated into the Windows ecosystem or those requiring enterprise-grade security, compliance, and administrative controls. It seamlessly combines professional email with a comprehensive suite of productivity applications, making it a top choice for organizations seeking an all-in-one digital workplace.
Microsoft 365 extends far beyond just sending emails with a custom domain. It provides a deeply integrated environment where Outlook serves as the command center for communication, scheduling, and task management. Depending on the plan, this is bundled with Microsoft Teams for collaboration, OneDrive for cloud storage, and the full desktop versions of Office apps like Word, Excel, and PowerPoint. This cohesive ecosystem is designed for businesses that rely on advanced email features and robust document management.
Security and Administrative Control
Microsoft has invested heavily in creating a secure and manageable hosted environment, making it one of the best email platforms for business from a security standpoint. The Microsoft 365 Defender and admin centers offer sophisticated tools to protect against evolving threats and ensure data governance.
- Advanced Threat Protection (ATP): Microsoft Defender for Office 365 provides powerful anti-phishing, anti-spam, and anti-malware filtering. Features like Safe Links and Safe Attachments scan links and files in real-time to block malicious content.
- Data Loss Prevention (DLP): Configure complex DLP policies to identify, monitor, and automatically protect sensitive information across email and other Microsoft 365 services, preventing accidental data leaks.
- eDiscovery and Litigation Hold: Higher-tier plans include advanced eDiscovery tools, allowing administrators to find, preserve, and export data for legal and compliance requirements.
- Hybrid Deployment Support: A key differentiator is its ability to support hybrid configurations, allowing businesses to maintain some mailboxes on-premises while migrating others to the cloud.
Pro Tip: Use the "Attack Simulation Training" feature within Microsoft Defender to run realistic cyberattack scenarios on your own users. This helps train them to recognize phishing attempts and improves your organization's overall security resilience.
Pricing and Plan Breakdown
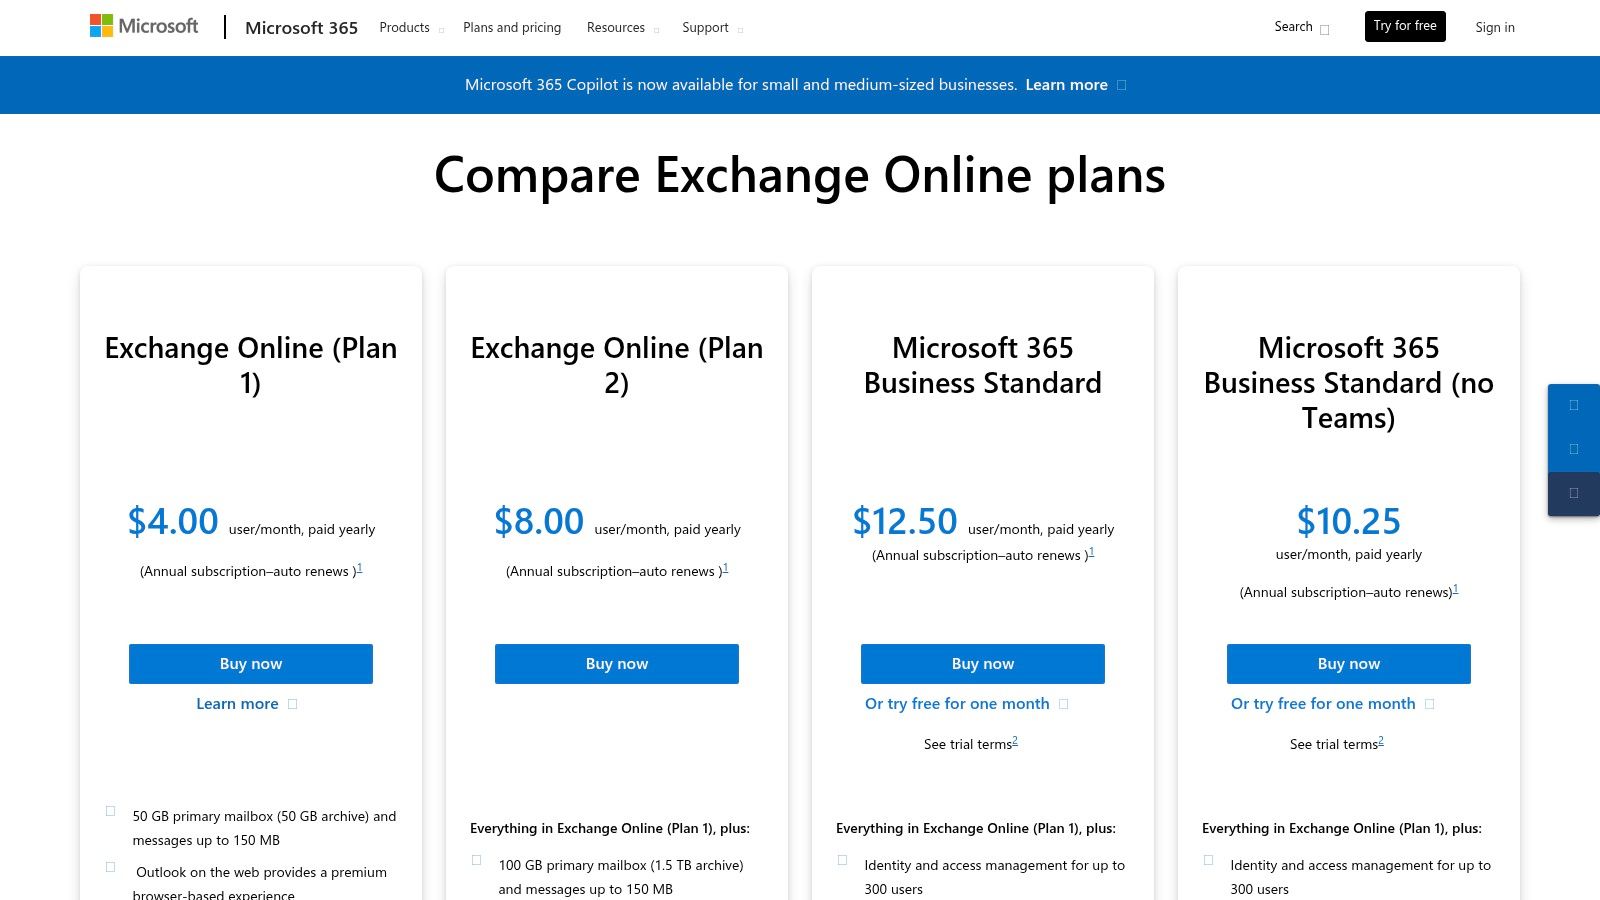
Microsoft 365’s pricing is structured to cater to a wide range of business sizes and needs, from basic email hosting to comprehensive enterprise bundles. For businesses primarily seeking email, the standalone Exchange Online plans are a cost-effective option.
| Plan | Key Features | Ideal For |
|---|---|---|
| Microsoft 365 Business Basic | Web/mobile Office apps, Teams, Exchange (50 GB mailbox), 1 TB OneDrive | Small businesses needing cloud services and professional email. |
| Microsoft 365 Business Standard | All Basic features + Desktop Office apps (Outlook, Word, etc.) | Businesses wanting the full Office suite along with cloud services. |
| Exchange Online (Plan 1) | 50 GB mailbox, Outlook on the web, advanced security features | Companies needing a secure, standalone hosted email solution. |
While the platform is incredibly robust, some organizations may find the ecosystem too complex or prefer alternatives. For those exploring different options, you can find top Microsoft Exchange alternatives for your business to compare features and pricing.
Pros:
- Deep integration with the Outlook client and Windows operating system.
- Mature, enterprise-grade security, compliance, and data retention features.
- Excellent support for hybrid deployments with on-premises Exchange servers.
Cons:
- The array of licensing options and plan bundles can be confusing to navigate.
- Accessing the full suite of advanced security features often requires subscribing to higher-tier, more expensive plans.
Website: https://www.microsoft.com/en-us/microsoft-365/exchange/compare-microsoft-exchange-online-plans
4. Zoho Mail / Zoho Workplace
Zoho Mail, part of the broader Zoho Workplace suite, has carved out a strong reputation as a secure, ad-free, and remarkably affordable hosted email platform. It appeals particularly to small and medium-sized businesses (SMBs) that need professional-grade email hosting without the premium price tag of its larger competitors. By focusing on privacy and a clean, user-centric experience, Zoho offers a compelling alternative for companies prioritizing cost-effectiveness and data security.
The platform is built on the principle that business email should be a private communication tool, not a data source for advertisers. It provides a robust, custom-domain email service (e.g., you@yourbusiness.com) that can be purchased as a standalone email plan or as part of the Zoho Workplace bundle, which includes tools like Zoho WorkDrive, Sheet, and Cliq for team collaboration. This flexibility allows businesses to start with just email and scale into a full productivity suite as needed.
Security and Administrative Control
Zoho provides a comprehensive control panel that gives administrators the tools necessary to manage users, secure data, and ensure compliance. This makes it one of the best email platforms for business for organizations that require strong security without a dedicated IT department.
- Multi-Factor Authentication (MFA): Admins can enforce MFA using various methods, including TOTP authenticators and Zoho's own OneAuth app, to secure user accounts against unauthorized access.
- S/MIME Encryption: Higher-tier plans support S/MIME, allowing users to send digitally signed and encrypted emails for enhanced message-level security and authenticity.
- eDiscovery and Retention: Advanced plans include eDiscovery to help organizations search and retrieve specific email data for legal and compliance purposes, alongside customizable email retention policies.
- Data Center Choice: Zoho allows administrators to choose the geographic location for their data hosting, aiding in compliance with data residency regulations like GDPR.
Pro Tip: Use Zoho's built-in, one-click migration tool to seamlessly transfer all your emails, contacts, and calendar data from providers like Google Workspace or Microsoft 365. This significantly simplifies the onboarding process.
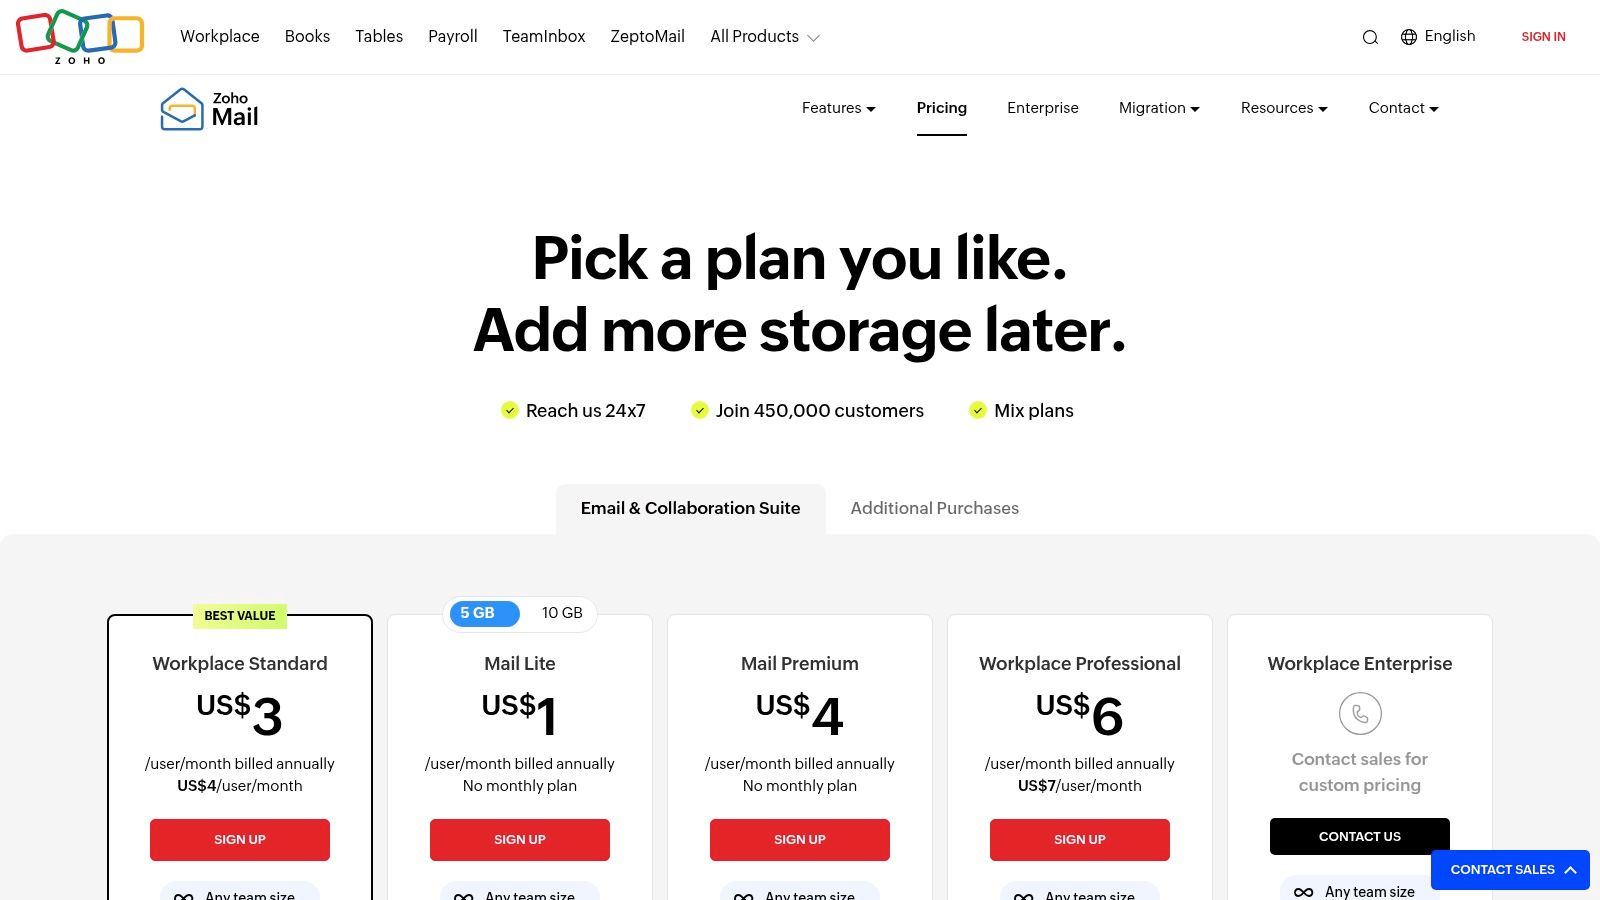
Pricing and Plan Breakdown
Zoho's pricing is one of its most attractive features, offering straightforward, per-user plans that provide exceptional value. They even offer a "Forever Free" plan for up to five users with basic features.
| Plan | Key Features | Ideal For |
|---|---|---|
| Mail Lite | Custom domain email, 5 GB/user storage, email forwarding | Solopreneurs and small teams needing professional email on a budget. |
| Mail Premium | 50 GB/user storage, S/MIME, email backup and restoration | Businesses requiring more storage and advanced security features. |
| Workplace Standard | Includes Mail Premium features + full productivity suite, 100 GB Mail storage | Organizations looking for an all-in-one, affordable alternative to Google or Microsoft. |
The clear separation between mail-only and full-suite plans allows businesses to choose precisely the services they need, avoiding unnecessary costs for unused features.
Pros:
- Extremely competitive pricing, including a free tier for micro-businesses.
- Strong commitment to privacy with a completely ad-free experience.
- Integrates seamlessly with the extensive Zoho ecosystem (CRM, Books, Projects).
Cons:
- The user interface and ecosystem are less familiar than those of Google or Microsoft.
- Some advanced security features like eDiscovery are reserved for higher-priced plans.
Website: https://www.zoho.com/mail/pricing.html
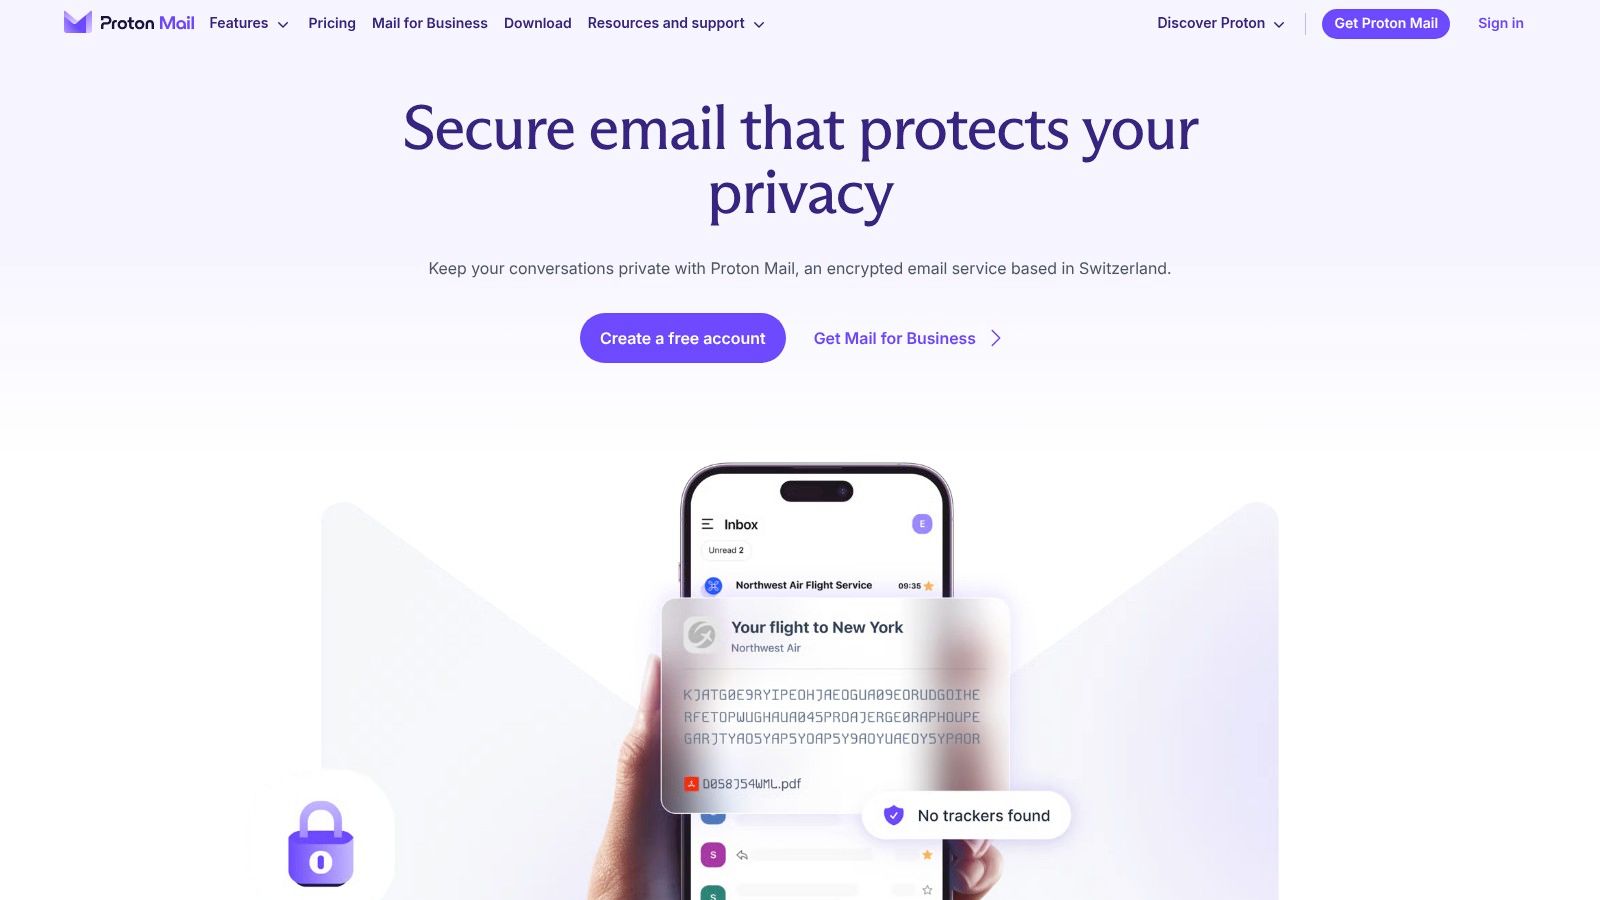
5. Proton for Business (Proton Mail)
Proton for Business is a privacy-first hosted email platform engineered for organizations that place the highest premium on security and data confidentiality. Based in Switzerland, a country known for its strong privacy laws, Proton provides end-to-end and zero-access encryption by default. This design ensures that no one, not even Proton, can read your business communications, making it one of the best email platforms for business in sectors like healthcare, law, and journalism where discretion is paramount.

The platform has evolved from a simple encrypted email service into a comprehensive privacy suite. Businesses can leverage a custom domain (e.g., info@yourcompany.com) within an ecosystem that includes Proton Calendar, Proton Drive for secure cloud storage, and Proton VPN for encrypted internet access. This all-in-one approach streamlines vendor management and provides a consistent, high-security environment for all business activities, distinguishing it from competitors who often treat privacy as an add-on rather than a core feature.
Security and Administrative Control
Proton’s administrative console is built to give organizations full control over their data security with user-friendly tools. It is a powerful example of a hosted email platform where advanced security does not compromise usability.
- End-to-End and Zero-Access Encryption: All emails, contacts, and calendar events are encrypted at rest and in transit, ensuring that only the sender and intended recipient can access the content.
- Proton Sentinel: This advanced account protection program goes beyond standard 2FA, using a combination of AI and human analysts to monitor for and block sophisticated account takeover attempts.
- Encrypted Contact and Calendar: Securely manage business contacts and schedule meetings with the guarantee that the data remains private and inaccessible to third parties.
- Easy User Management: Administrators can easily add or remove users, manage storage quotas, and set organizational-level security policies from a centralized dashboard.
Pro Tip: Use the "Password-protected Emails" feature to send end-to-end encrypted messages to recipients who do not use Proton. The recipient receives a link to a secure webpage where they enter a pre-shared password to decrypt and view the message.
Pricing and Plan Breakdown
Proton for Business offers straightforward, per-user pricing that bundles its core privacy tools. Plans are designed to support everyone from small businesses to larger enterprises with compliance needs.
| Plan | Key Features | Ideal For |
|---|---|---|
| Mail Essentials | Custom email, 15 GB storage/user, 10 custom domains | Teams needing a secure, encrypted email solution. |
| Business | 500 GB storage/user, Mail, Calendar, Drive, and VPN | Businesses wanting an all-in-one encrypted productivity suite. |
| Enterprise | Custom storage, dedicated support, optional on-site deployment | Large organizations with specific compliance and security requirements. |
Proton provides an "Easy Switch" tool to simplify migration, allowing businesses to import existing emails, calendars, and contacts from providers like Gmail or Outlook. For those interested in a deeper look at secure email options, you can learn more about top email providers for privacy.
Pros:
- Unparalleled privacy and security with default end-to-end encryption.
- Data hosted in Switzerland under strict privacy laws.
- Transparent, straightforward pricing with a 14-day free trial.
Cons:
- Third-party integrations are less mature compared to Google Workspace and Microsoft 365.
- Migration from legacy systems, especially those heavily reliant on specific Outlook workflows, may require careful planning.
Website: https://proton.me/business/mail/pricing
6. Amazon WorkMail (AWS)
Amazon WorkMail is a secure, managed business email and calendaring service built on the robust infrastructure of Amazon Web Services (AWS). It is designed for organizations that prioritize security, data residency control, and seamless integration within the AWS ecosystem. While it may not offer the expansive productivity suites of its competitors, WorkMail establishes itself as one of the best email platforms for business by delivering a no-nonsense, highly secure, and cost-effective hosted email solution.
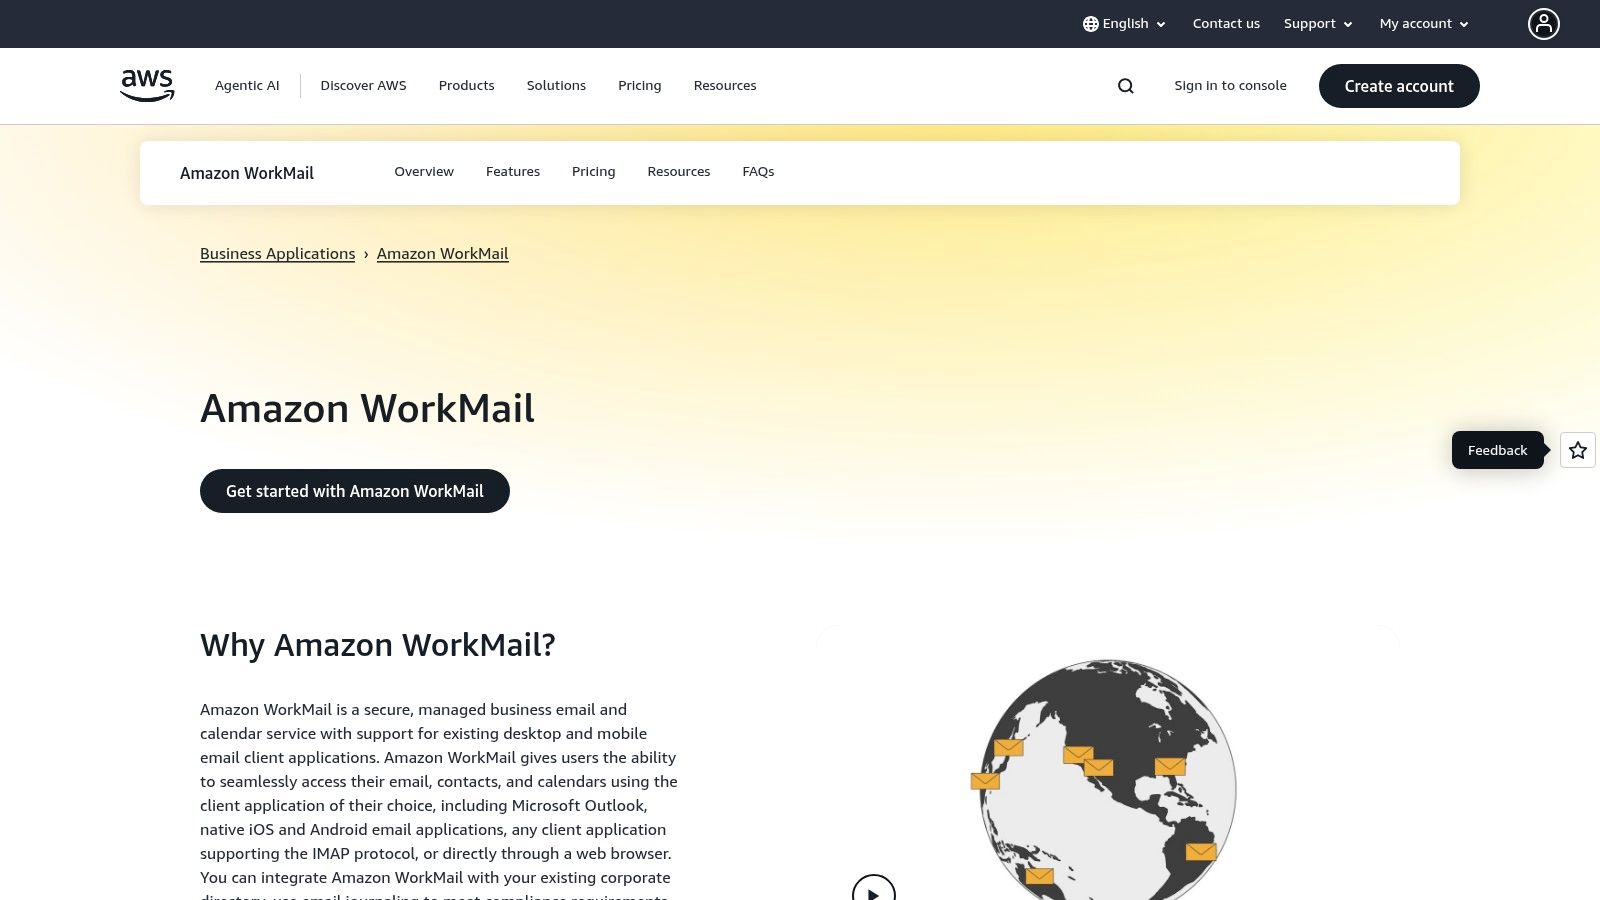
The platform’s core strength lies in its deep integration with AWS, making it an ideal choice for companies already leveraging AWS for their IT infrastructure. It provides users with a generous 50 GB mailbox and supports popular email clients like Microsoft Outlook, as well as native iOS and Android email applications, through the Microsoft Exchange ActiveSync protocol. This ensures a familiar user experience without requiring extensive retraining for staff.
Security and Administrative Control
Amazon WorkMail places a heavy emphasis on security and data sovereignty, offering granular controls that appeal to IT administrators in regulated industries. The platform leverages the powerful security services native to AWS to protect organizational data.
- Data Residency Control: Administrators can choose the specific AWS Region where their organization’s data is stored, helping to meet data locality requirements for compliance with regulations like GDPR.
- Integrated Encryption: All data at rest is automatically encrypted using keys managed through AWS Key Management Service (KMS). Data in transit is secured using industry-standard SSL/TLS encryption.
- Directory Integration: WorkMail integrates with existing Microsoft Active Directory, allowing businesses to use their current credentials and enforce existing group policies for seamless user management.
- Email Flow Rules: Set up rules at the organizational level to filter incoming emails, helping to block spam and malware before they reach user mailboxes.
Pro Tip: For enhanced security, integrate Amazon WorkMail with AWS Identity and Access Management (IAM). This allows you to define fine-grained access policies and enforce multi-factor authentication (MFA) for both user and administrative access.
Pricing and Plan Breakdown
Amazon WorkMail offers a refreshingly simple and transparent pricing model. It avoids complex tiers, providing one straightforward plan that includes all its core features. This makes it easy to predict costs without worrying about upselling for essential security or storage capabilities.
| Plan | Key Features | Ideal For |
|---|---|---|
| Amazon WorkMail | 50 GB mailbox per user, Microsoft Exchange ActiveSync support, AWS Region data control, integrated security with AWS KMS. | Businesses of all sizes, especially those already using AWS, who need a secure, low-cost, and straightforward email hosting solution. |
The single plan is priced at a competitive $4 per user per month. Amazon also offers a generous 30-day free trial for up to 25 users, allowing organizations to fully evaluate the service and its integration capabilities before committing.
Pros:
- Simple, predictable, and low-cost pricing model.
- Strong security features, including full encryption and regional data control for compliance.
- Excellent integration with the broader AWS ecosystem (IAM, KMS, S3).
Cons:
- Lacks an integrated suite of productivity tools like documents or spreadsheets.
- The user-facing interface and feature set are more basic compared to Google Workspace or Microsoft 365.
Website: https://aws.amazon.com/workmail
7. Rackspace Email
Rackspace Email is a straightforward, reliable, and budget-friendly hosted email platform designed for businesses that need professional email without the complexity of a full productivity suite. It focuses on delivering core email functionality with robust stability and exceptional, human-powered support, making it an excellent choice for organizations that prioritize dependability and direct assistance over extensive integrated apps.
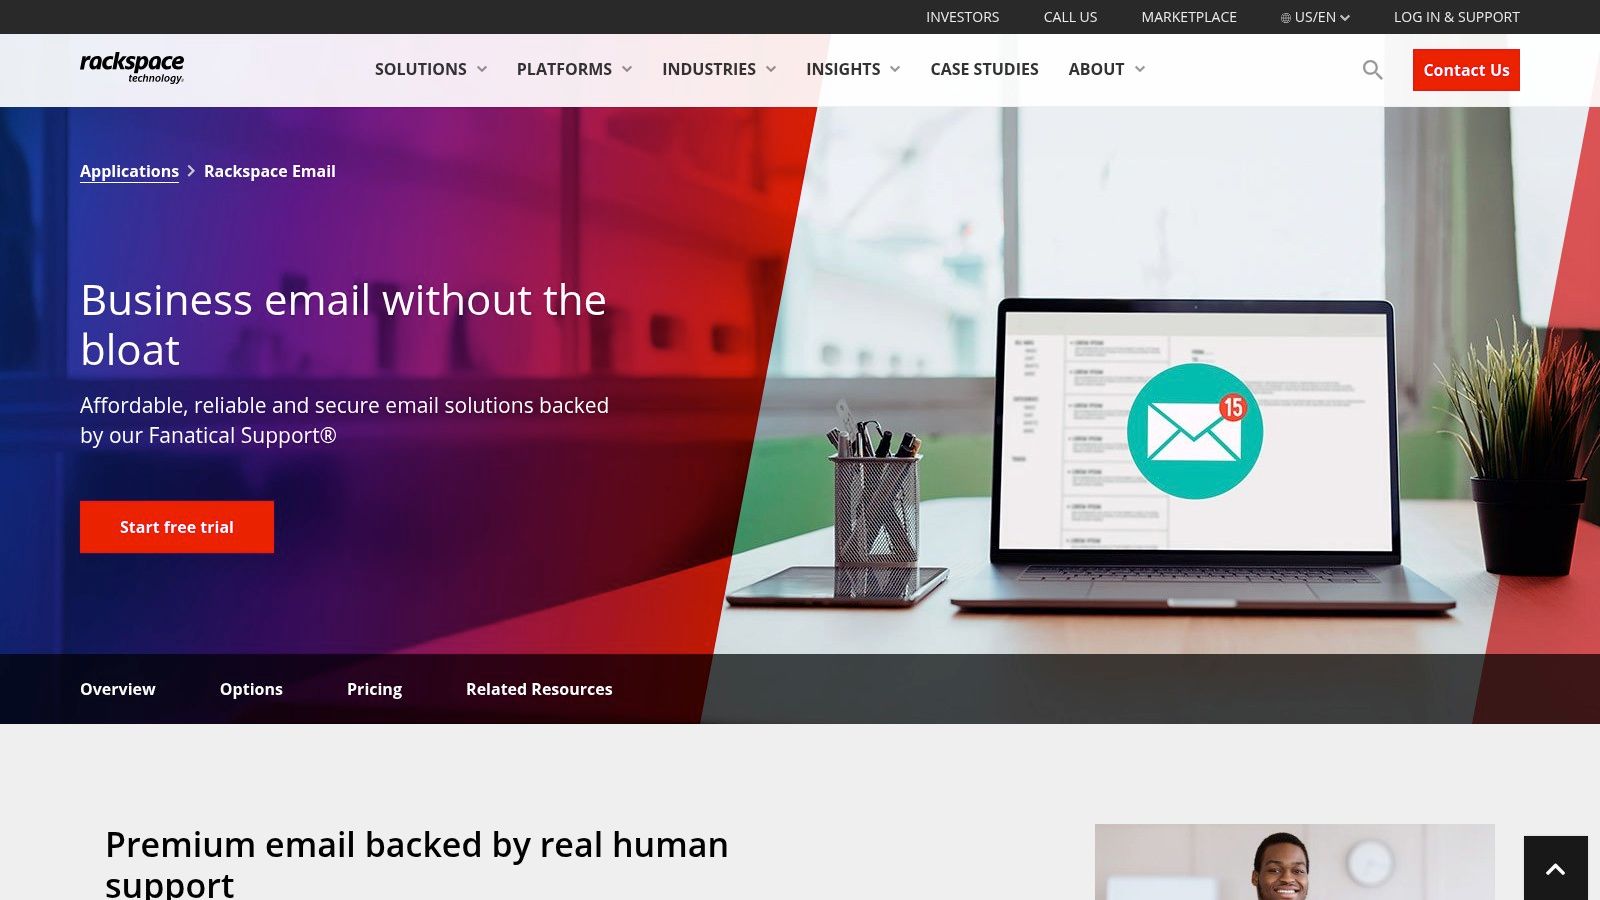
The platform’s primary strength lies in its simplicity and accessibility. It provides a professional email address with your custom domain (e.g., info@yourbusiness.com), accessible via a clean webmail interface, desktop clients like Outlook, or mobile devices. Unlike all-in-one solutions, Rackspace unbundles its services, allowing businesses to pay only for what they need, such as adding advanced features like ActiveSync for mobile synchronization or email archiving on a per-mailbox basis.
Security and Administrative Control
Rackspace provides essential security features and a user-friendly control panel that simplifies email management for business owners and IT staff. The focus is on providing a secure and spam-free email experience, making it one of the best email platforms for business that value a no-frills, secure setup.
- Premium Anti-Spam and Anti-Virus: All incoming and outgoing mail is scanned with multi-layered filters to block junk mail and malicious threats before they reach your inbox, ensuring a clean and secure communication channel.
- IMAP/POP and Webmail Access: Flexible access options allow users to connect via their preferred desktop email client (like Outlook or Apple Mail) or through any web browser.
- Add-on Archiving: For businesses needing to meet compliance or data retention requirements, Rackspace offers a separate email archiving service to securely store all email communications.
- Expert Migration Support: Rackspace is renowned for its free and guided migration assistance, where their team helps you move your existing emails, contacts, and calendars with minimal downtime.
Pro Tip: When setting up new mailboxes, leverage Rackspace's 24x7x365 Fanatical Support. Their team can walk you through DNS record configurations (MX, SPF, DKIM) to ensure optimal email deliverability and security from day one.
Pricing and Plan Breakdown
Rackspace Email is priced competitively on a per-mailbox, per-month basis with no long-term contracts. This model allows for predictable costs that scale directly with your team size.
| Plan/Service | Key Features | Ideal For |
|---|---|---|
| Rackspace Email | 25 GB mailbox, premium spam/virus protection, webmail access | Small businesses and startups needing affordable, professional email. |
| Rackspace Email Plus | Includes ActiveSync for mobile sync and 30 GB of file storage | Teams that rely heavily on mobile devices and need basic cloud storage. |
| Hosted Exchange | Full Microsoft Exchange features, 100 GB mailboxes, shared calendars | Businesses seeking advanced collaboration features and deep Outlook integration. |
This tiered approach gives businesses a clear upgrade path. You can start with basic email and seamlessly transition to Hosted Exchange or even Microsoft 365 through Rackspace as your operational needs evolve, all while retaining the same support partner.
Pros:
- Very low cost for essential business email hosting.
- Reliable and highly-regarded 24/7/365 customer support.
- Offers a clear and simple upgrade path to Hosted Exchange or Microsoft 365.
Cons:
- The core plan lacks the integrated productivity apps found in suites like Google Workspace or Microsoft 365.
- Advanced compliance and security features often require add-ons or more expensive plans.
Website: https://www.rackspace.com/applications/rackspace-email
Top 7 Business Email Platforms Comparison
| Product | Implementation Complexity 🔄 | Resource Requirements ⚡ | Expected Outcomes 📊 | Ideal Use Cases 💡 | Key Advantages ⭐ |
|---|---|---|---|---|---|
| Typewire | Moderate; user-friendly with fast migration | Moderate; Canadian data center hosting | High privacy and security with no ads or tracking | Privacy-conscious individuals and SMBs | Full privacy, strong security, no ads/tracking |
| Google Workspace (Gmail) | Moderate to high; admin controls can be complex | Moderate to high; integrated productivity suite | Reliable, collaborative environment with AI assistance | SMBs needing robust collaboration and integrations | Familiar UI, rich app ecosystem, strong security |
| Microsoft 365 for Business | High; complex licensing and setup options | High; requires Microsoft ecosystem | Enterprise-grade compliance, full Outlook compatibility | Enterprises needing Exchange/Outlook and hybrid setups | Deep Outlook features, mature compliance |
| Zoho Mail / Zoho Workplace | Low to moderate; simpler than big suites | Low; cost-effective and flexible plans | Affordable, ad-free email with solid security | SMBs seeking budget-friendly, secure email | Competitive pricing, ad-free, part of Zoho suite |
| Proton for Business | Moderate; planning needed for migration | Moderate; hosted in Switzerland | Strong end-to-end encrypted email and all-in-one suite | Teams prioritizing privacy and compliance | Privacy-first, strong encryption, transparent pricing |
| Amazon WorkMail (AWS) | Moderate; easy AWS provisioning | Moderate; simple pricing per user | Secure email with AWS region controls and Exchange interoperability | Organizations heavily invested in AWS | Low cost, AWS integration, regional data control |
| Rackspace Email | Low; straightforward setup with human support | Low; budget-friendly with add-ons | Basic reliable email with optional upgrades | Budget-conscious businesses needing support | Low cost, 24/7 support, easy migration |
Making the Final Choice: A Quick Decision Framework
Navigating the crowded marketplace of the best email platforms for business can feel overwhelming. We've journeyed through industry titans like Google Workspace and Microsoft 365, examined privacy-first champions like Proton for Business, and explored versatile solutions such as Zoho Workplace and Typewire. The core lesson is clear: the "best" platform is not a one-size-fits-all solution. It's the one that aligns perfectly with your organization's unique operational needs, security posture, and growth trajectory.
Your decision hinges on a delicate balance of features, security protocols, and total cost of ownership. While a feature-rich suite from Microsoft or Google offers immense collaborative power, a dedicated, privacy-focused provider like Proton or Typewire might be the superior choice for organizations handling sensitive client data or operating in heavily regulated industries. The right choice is the one that empowers your team without compromising on the foundational pillars of privacy and security.
A Framework for Your Decision
To simplify your selection process, consider your business needs through this practical decision-making framework. Answer these questions honestly to illuminate the path to your ideal hosted email platform.
1. What is your primary business driver?
- Maximum Collaboration: If your team lives in shared documents, spreadsheets, and video calls, Google Workspace or Microsoft 365 are the undisputed leaders. Their deep integration between email, calendars, and productivity apps creates a seamless ecosystem.
- Unyielding Privacy and Security: For legal firms, healthcare providers, journalists, or any business where confidentiality is paramount, a zero-knowledge, end-to-end encrypted platform is non-negotiable. Proton for Business and Typewire are purpose-built for this, ensuring no third party, not even the provider, can access your data.
- All-in-One Business Suite: If you're a small to medium-sized business looking for an email solution that plugs into a broader CRM, finance, and marketing ecosystem, Zoho Workplace offers unparalleled value and integration.
2. How much technical expertise do you have in-house?
- Minimal IT Staff: Platforms like Rackspace Email and Zoho Mail are celebrated for their straightforward setup and user-friendly admin consoles. They allow non-technical founders or office managers to handle user creation and basic administration with ease.
- Dedicated IT Team: If you have developers or system administrators on staff, the power and flexibility of Amazon WorkMail (AWS) become a significant advantage. Its integration with the vast AWS ecosystem allows for sophisticated custom workflows, security policies, and infrastructure management.
3. What is your tolerance for complexity versus control?
- Simplicity is Key: You need a reliable, set-it-and-forget-it email service. Look for platforms with intuitive interfaces and clear pricing tiers. Rackspace Email excels here, offering a no-frills, dependable service focused squarely on email.
- Granular Control is Mandatory: Your security protocols require detailed control over data residency, access policies, and integration with other systems. AWS WorkMail, Microsoft 365, and Typewire (with its focus on secure infrastructure) provide the advanced administrative tools necessary for meticulous oversight.
Final Takeaways and Next Steps
Choosing your business email platform is a foundational security decision that impacts productivity and client trust. Before you commit, take these final steps:
- Audit Your Current System: Identify the pain points. Are you battling spam? Is your current provider's privacy policy a concern? Do you lack essential collaboration tools?
- Engage in a Free Trial: Nearly every provider on this list offers a free trial or a free basic tier. Use this opportunity to test the user interface, evaluate the admin controls, and see how the platform fits into your team's daily workflow.
- Consider Long-Term Scalability: Your business will grow. Ensure the platform you choose can scale with you, allowing for easy addition of new users, expanded storage, and access to more advanced features as your needs evolve.
Ultimately, selecting one of the best email platforms for business is an investment in your operational integrity. By prioritizing security, understanding your team's workflow, and planning for the future, you can confidently choose a partner that will support your communication needs for years to come.
If you're looking for a platform that prioritizes security and privacy without the complexity of a massive tech suite, consider Typewire. It provides a secure, private, and ad-free email experience designed for businesses that demand confidentiality and control. Explore how Typewire can become the secure communication hub for your business today.